Using Algolia Search with Wagtail
Algolia is a search and indexing service that lets you outsource your internal search to create a mini-search engine inside your website. In this article we'll learn how to set up Algolia with your Wagtail website.


Using Algolia Search with Wagtail
Searching through your models can be tricky. Working with ElasticSearch isn't hard, but it does mean more coding and more maintenance. And while there are many great ways to search through your content, we're going to look at a third party service: Algolia.
In this article we're going to setup Algolia on a Wagtail website. If at any time you get lost, or perhaps the winds have changed, Algolia also has their Django package docs. But we'll walk through this together right now.
Also, before we get started, I've created a super tiny repo with just the files that are referenced in this article (in no particular setup since a lot of Django/Wagtail setups are actually quite different).
First things first, you'll need an Algolia account. You can set up a free trial account for a couple weeks and test everything (or create an account just for learning; that's not a bad idea, either). If you don't have one, go get your free Algolia trial account now.
Algolia will walk you through the setup. They'll ask you the typical sign up questions: your name, your position at your company, and so on. They'll also help you find the closest data center to you, so the search results can be returned as fast as humanly possible. And lastly, they ask you what kind of app you're building and when you plan on launching it. None of this is super private data at this point.
You'll be asked which integration you want to use, for us Wagtail lovers we'll select Django. It'll open up this GitHub repo.
Next, let's actually do something.
Assuming you have a Wagtail website setup, let's jump into the first step.
pip install algoliasearch-django
And in your INSTALLED_APPS you'll need to add this package:
INSTALLED_APPS = (
   ...
   'algoliasearch_django',
)
Now if you hop back to your Algolia dashboard, along the left of the dashboard is your navigation menu. Right now, we need the most important part of the application: the API keys. Click on API Keys and you'll be brought to a page that's familiar to devs. It should look like this:
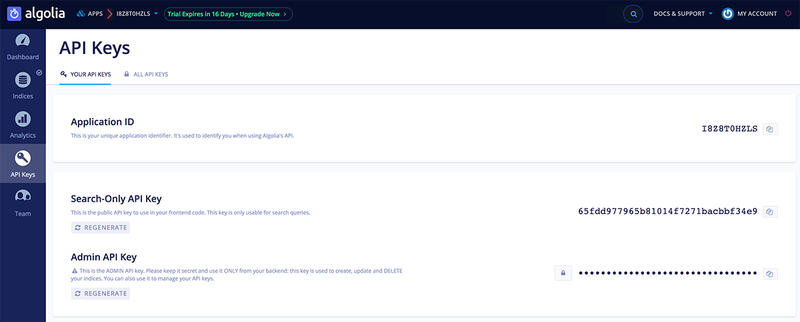
Note: this is just a temporary account I've made for the sake of this article, the API keys are no longer available. You'll want to make your own ;)
On this page you'll find a couple important pieces to the Algolia puzzle:
- Your Application Id
- Your API Key
ALGOLIA = {
    'APPLICATION_ID': 'I8Z8T0HZLS',  # Swap this out for your Application ID
    'API_KEY': 'fe0aab09f4473c77a7b71011a1508687'  # This is your "Admin API Key"; replace this with your own
}
Put that above snippet in your main settings.py file.
At this point you can pause here and explore their API. They have a bunch of additional settings that we aren't going to cover in this article, but they are worth exploring. Or we can rip through this tutorial together and then you can explore the other Algolia options.
Moving forward, we'll need to actually start writing some Python.
The really cool part: Algolia plugs into Wagtail perfectly!
If you're like me, you have some of your wagtail.core.Page models inheriting some other classes, other than Page (additional mixins). For instance, adding banner options to most-but-not-all pages. Or a LoginRequired mixin. Well with Algolia, we don't need to do any of that, and in my opinion that's really nice because we can keep our already elegant Wagtail pages nice and clean and your current workflow or Wagtail habits don't need to change. Below is an example of a simple page being registered with Algolia.
# admin.py
# Register Wagtail models with Algolia search

from algoliasearch_django import AlgoliaIndex
from algoliasearch_django.decorators import register

from .models.basic import BasicPage


@register(BasicPage)
class BasicPageIndex(AlgoliaIndex):
    """Register Basic Page Index with Algolia."""

    fields = ("title", "seo_title", "search_description")
    settings = {
        "searchableAttributes": [
            "title",
            "seo_title",
            "search_description",
        ]
    }
    index_name = 'INDEX_NAME'
Now if you've read the Python snippet above, and you're thinking:
- What is "BasicPage"?
- Why is index_name = 'INDEX_NAME' and what is this?
And if you're not questioning these, well that's OK, we'll go over this anyway!
So the "BasicPage" class (from .models.basic import BasicPage) is just a Wagtail Page I've made. Below is an example of the page (it's very straightforward, I promise there's nothing worth noting in here)
"""Basic Wagtail Page."""
from wagtail.core.fields import StreamField
from wagtail.core.models import Page

from cms.stream_fields import blocks


class BasicPage(Page):
    """A basic page class."""

    template = "cms/pages/basic_page.html"  # Because I enjoy being verbose
    content = StreamField(
        [
            ("richtext_block", blocks.RichTextBlock()),  # Just a streamfield ¯\_(ツ)_/¯
        ],
        null=True,
        blank=True,
    )

    class Meta:
        verbose_name = "Basic Page"
        verbose_name_plural = "Basic Pages"
Now we need to tackle this "INDEX_NAME". It's not as scary or unknown as it seems.
Think about how Google scrapes and indexes websites. Well, Algolia doesn't do that — instead you submit model changes to Algolia. Whenever a page is saved (whenever a Django Model is saved) it will submit the changes to Algolia. By default, it won't save everything, it'll only keep the primary key (pk). We need to specify what to save, but before we do that, Algolia needs to have an "index" of to save your data to.
So let's head back over to your Algolia dashboard.
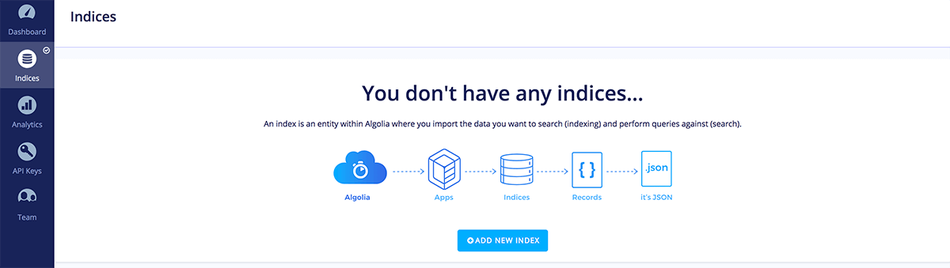
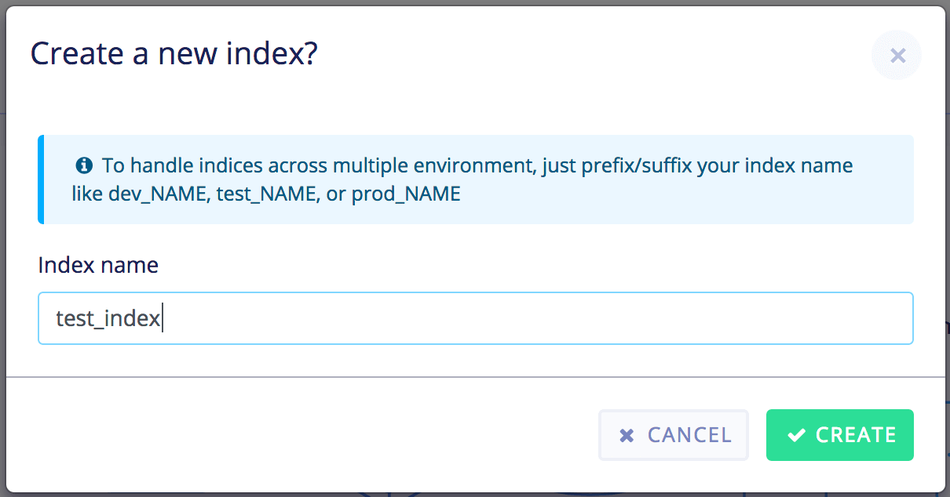
Above, I created an index called test_index. You can name yours anything you like!
Also note that Algolia will actually create an index for you if you don't already have one. This is just another nice perk to working with an intelligent service like Algolia! So don't fret if you missed that last step.
Remember in our admin.py file, where we wrote index_name = 'INDEX_NAME'? You probably guessed it, let's replace that. Also that fields field becomes important.
@register(BasicPage)
class BasicPageIndex(AlgoliaIndex):
    """Register Basic Page Index with Algolia."""

    fields = ("title", "seo_title", "search_description")  # *This field becomes important now!*
    settings = {
        "searchableAttributes": [
            "title",
            "seo_title",
            "search_description",
        ]
    }
    index_name = 'test_index'  # This is the name of the index from the image above.
At this point, you can manually add search results to your Algolia index. But that's no way to live your life. Instead, you'll want to create a new Basic Page in your Wagtail admin, and save it. That's it!
Refresh your Algolia dashboard, and you should see your page results in there! The data you'll see in your Algolia index will match the `fields` field in your BasicPageIndex class.
Note: I've seen Algolia take a couple minutes to display the search results in their dashboard, but the search query (what we'll tackle shortly) appear to be instant. If you don't see your Algolia index being updated within about 2 minutes, then it's probably your code. But more often than not, it's instantly updated!
All that setup, but how do we pull the data OUT of Algolia?
Here is where we start mixing our beautiful Wagtail Pages with Algolia to create a search results page. It's actually super easy, all we need to do is check for a query string, init Algolia, and return the results in our context. Check out how easy this is:
"""Search Page models."""
from django.conf import settings  # 1
from wagtail.core.models import Page  # 2
from algoliasearch import algoliasearch  # 3


#  4
class SearchPage(Page):
    """A search page class."""

    template = "cms/pages/search_page.html"

    class Meta:
        verbose_name = "Search Page"
        verbose_name_plural = "Search Pages"

    def get_context(self, request):
        """Algolia Searching. This view is used for page requests, not typing autocomplete."""
        context = super().get_context(request)
        query_string = request.GET.get("q") or False
        if query_string:
            client = algoliasearch.Client(
                settings.ALGOLIA.get("APPLICATION_ID"), settings.ALGOLIA.get("API_KEY")
            )
            algolia_index = client.init_index("test_index")
            context["results"] = algolia_index.search(query_string)
        return context
We've really only done a few small things — both Wagtail and Algolia have made this incredibly easy for us.
First, we import our Django settings. We need this for our Algolia Application ID and API Key.
Then we import the Wagtail Page model. Standard stuff so far.
Then we import Algolia search.
And we set up a new page called SearchPage. Let's fast forward a little bit where the real magic happens: inside the get_context() method. It'll check if there's a ?q= parameter in your URL, and if it exists, it'll init Algolia and start a search and Algolia will return the closest results and pass it to the page context.
The results are based on the settings.searchableAttributes in the BasicPageIndex class.
So now if you view your live page, and add your own query (ie: yoursite.com/search/?q=test) you'll query the Algolia indexes you've created. The last thing we need to do is loop through the search results in your template. It's pretty easy, but this part isn't super intuitive to be honest.
{# search_page.html #}
{% extends "base.html" %}

{% block content %}
  {% for result in results.hits %}
    {{ result.YOURCUSTOMFIELDNAME }} {# Try changing to result.title for actual results #}
  {% endfor %}
{% endcontent %}
In the above code, where it says YOURCUSTOMFIELDNAME, that needs to match what's in your fields field. To get this working, simply use {{ result.title }}. If nothing shows up, make sure you have an index with a searchable wagtail field that has a value with the word you're looking for. By default, you'll have access to the Page ID (pk), and then anything else you tell Algolia to keep on your behalf. In the example code we've been working with, you'll have access to title, seo_title and search_description. But you're not limited to these. You can add your own fields, and as you add fields to your Wagtail Page model, you can add those fields to your Algolia index, too (if you want).